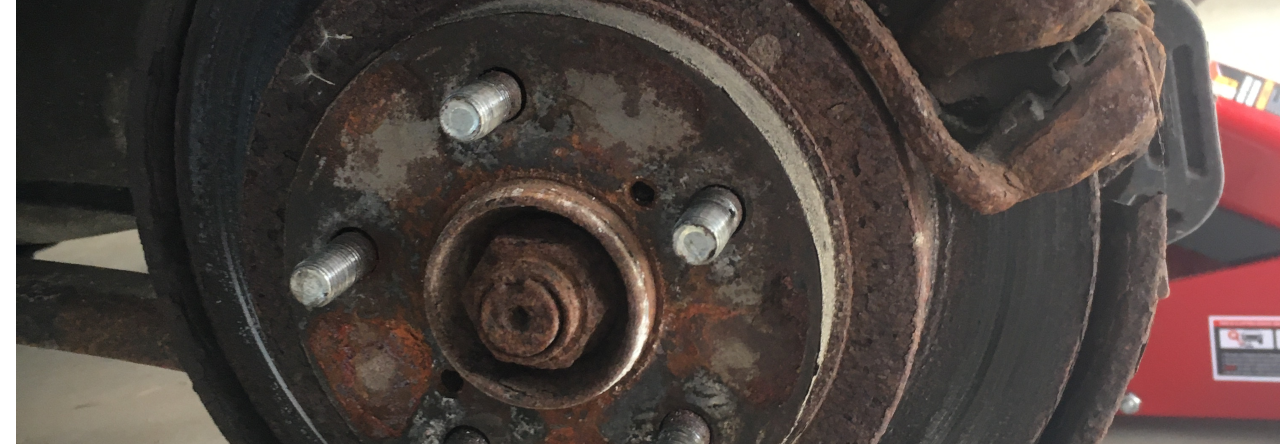
This page outlines the procedure for the replacement of brake pads on a 2007 Subaru Impreza Limited Edition; brake assembly photos show the rear right brake by way of example. The procedure is likely to be more or less similar for other models or makes.
Brake pads should be replaced before they are worn to the recommended limit (here 1.5mm).
Files documenting parts and procedures follow.
Tools and materials
For this job, you will need the following:
- materials
- replacement brake pads
- tools
- wheel chocks
- hydraulic jack (or equivalent)
- jack stand
- socket wrench and sockets
- C-clamp (appropriate size and strength)
- caliper (digital or otherwise)
- micrometre
- file or wire brush, and
- torque wrench(es).
You may also require or wish to use:
- materials
- petroleum jelly
- brake fluid
- tools
- tire iron
- standard screwdriver (or similar).
The following are strongly recommended:
- eye protection, and
- appropriate clothing, including gloves.
Preparatory steps
Immobilize the vehicle:
- Make sure the front wheels are parallel to the car.
- Put the car into reverse (manual transmission) or park (automatic transmission), as the case may be.
- Engage the parking brake.
- Place wheel chocks about the wheel which is diametrically opposed to the one to be worked on; i.e., if working on the front left, place them against the rear right tire, etc.
- If you wish, pop the hood/bonnet and crack the master cylinder cap open (see note on this below). If you do this, I recommend that you leave the hood/bonnet propped open so that you don’t forget to close it again later.
Raise the vehicle slightly:
- Place the hydraulic jack under the jack-up plate (front) or differential (rear), as the case may be.
- Raise the car sufficiently that the load on the wheel is reduced, but without raising the wheel off the ground.
- Using a tire iron or socket wrench (here 19 mm), loosen the lug nuts, but only just.1)The point here is safety. You don’t want to remove the wheel or render it unstable until the vehicle has been properly secured on the jack stand. On the other hand, it is easier to loosen the lug nuts before the wheel is off the ground since it provides resistance to the torque.
Now, raise the vehicle the rest of the way:
- Continue to raise the car so that
- the wheel to be worked on is off the ground
- a jack stand can be placed under an appropriate support (such as the flange inside the manual jack point in the rear, etc.), and
- when the vehicle is lowered onto the jack stand, the wheel remains of the ground.
- Place the jack stand and lower the hydraulic jack, gently. If the wheel no longer clears the ground, repeat this procedure.
- Remove the lug nuts and place them into suitable container so they don’t roll away and get lost.
- Remove the wheel and lay aside. Some like to lay it under the car frame for additional security in case of jack stand failure.
The brake assembly is now exposed and the actual work can proceed.
Removing the old pads
Removal of the pads occurs in several steps.
Exposing the pads
The simplest way to change pads is to move the caliper out of the way without removing it. This also has the advantage that one needn’t worry about damaging the break line. To do this:
- Remove the lower caliper bolt using a socket wrench (here 14 mm).
- Loosen the upper caliper bolt just enough that the caliper can swing up and out of the way of the pads.
Returning the caliper piston
The official instructions—and most how-tos—don’t mention the next step until reassembly, but I recommend doing it now, because if it can’t be done, it means the caliper is seized and will need replacing. It is best to know that at this point and save the frustration of wasted time and effort in reassembly without repair or leaving the vehicle on jack stands, potentially for days, while acquiring a replacement caliper.
So, return the caliper piston to the open position:
- Open the master cylinder cap so that air (and possibly fluid) can escape as needed, but leave the cap mostly in place. The point is to break the seal without allowing dirt to enter the system.2)Note: I have not found this to be necessary, since air compresses easily, unlike brake fluid—that is, after all, the point of hydraulic brakes!
- Place a solid piece of metal, or better, a piece of wood, across the piston face, to avoid damaging it.
- Place the C-clamp such that the fixed end is behind the piston and the movable part is against the metal or wood.
- Turn the handle clockwise, slowly (to allow the fluid in the system to return up the line so that the piston can retract) until the caliper is open (face nearly flush with the housing).
As noted: if this cannot be done without excessive force, there’s a problem with the caliper and that’s the end of the road until it’s replaced.
Inspection of caliper travel
In line with the caliper bolts which have been removed or loosened is a pin inside a rubber boot.
It’s a good idea to make sure that those are well lubricated and that the outside portion of the caliper can travel freely. If not, lubricate this area as well.3)This will of course require removing the other caliper bolt, in which case great care must be taken not to kink the brake line.
Actual removal
This is simple enough: the pads are exposed and should come out easily. If they need persuading, this is where the screwdriver or similar tool comes in.
Don’t forget to remove the clips as well.
Note: If there is is a wear indicator,4)This is a metal clip attached to one of the pads which hits the rotor when the pads wear to their limit and makes a horrendous sound. If that every happens, one should stop driving as the rotor will get scored. It also indicates that one has really waited just a little too long before doing the job. it should be on the inner pad if properly installed. It will work just fine on the other side, but it isn’t easily inspected visually without dismantelling unless it’s on the inside.
Dispose of the pads responsibly. If you wish, measure the remaining thickness; it can be instructive if one has been advised by a garage to change the pads, since they probably err on the side of caution, which, if excessive, may mean the side of lining their pockets!
Reminder: For the vehicle in question, the limit is 1.5 mm for both front and rear.
Optional but recommended step
Since the caliper is out of the way and the old pads have been removed, it’s the perfect time to inspect the rotor for damage (scoring, warpage) or excessive wear.
To test for wear,
- Use a micrometre to gauge the thickness of the rotor; compare this to the spec limits. The point of using a micrometre rather than a caliper is that the outside rim of the caliper does not wear, leaving a lip which prevents proper readings.
- Should a micrometre not be available, suitable spacers can be placed on either side of the caliper (washers, nuts, whatever), the measurement taken, then reduced by the combined width of the spacers.
For this vehicle, the limit is 22 mm in the front and 8.5 mm in the rear.
Installing the new pads
In principle, installing the new pads is the famous ‘reverse the steps above’, but with a few extra twists.
Cleaning
Brakes get very grimy and rusty, so before putting any new parts in place, it is wise to to a tidy-up first.
- Using the file or wire brush, remove any dirt from places where clips and pads make contact.
- Do a tidy-up of the caliper around the piston, taking care not to damage the rubber boot surrounding the piston.
- If you wish, apply some brake cleaner,5)Non-chlorinated is least environmentally damaging and works just fine. taking care not to spray the rubber boot. It can be shielded, perhaps using the same thing which was used on the piston face earlier.
Preparing pads and clips
New brake pads typically come with a small quantity of lubricant.
Apply lubricant to the clips in the places which will be in contact with the pads, then apply lubricant to the shim of each pad; this is the outside face of the pad, i.e., the one which is not in contact with the rotor.
Actual installation
First, put the clips into place. Then, insert the pads.
Note: New parts are often a bit tight, so this can be a little more work than one would think. Make sure the clips are well seated, since they otherwise bind. The helpful screwdriver-or-similar may also come into play here.
Replacing the caliper
If the piston has been returned sufficiently, the caliper should now swing back into position around the new pads. If not, repeat the procedure above to open it further.
- Swing the caliper back into place under control. Don’t drop it!
- Make sure that the squarish guide pin heads are properly aligned or the caliper won’t return into place properly.
- Tighten the caliper bolts to the appropriate torque using a torque wrench (here 37 Nm or 27.5 ft-lb).
It’s a good idea, by the way, to lubricate bolts which have been removed before putting them back, as this helps prevent them from seizing. Petroleum jelly works well.
And that’s it!
Closing steps
Replace the wheel:
- Retrieve the wheel from its temporary storage location, and mount it.
- Replace the wheel lugs—ideally greased, first—and tighten with fingers, socket wrench, or tire iron, but no need to get too carried away. The point is to make sure that the wheel sits snugly.
Remove the jack stand:
- Use the hydraulic jack to raise the vehicle sufficiently that the jack stand can be removed.
- Check to make sure nothing is under the wheel or other part of the car which could be damaged by lowering the vehicle.
- Lower the vehicle so that sufficiently much load is placed on the wheel to prevent it rotating, if you can.6)This may depend on the jack; the one I use doesn’t seem to allow for very gradual lowering.
- Tighten the lug nuts to the proper torque (108.5 Nm/80 ft-lb7)I was actually not able to find this in my maintenance manual. On-line searches suggested this figure or slightly less, depending upon the site.).
- Lower the vehicle the rest of the way if you haven’t already.
Then remove the hydraulic jack.
Check the brake fluid
Whether or not you opened the master cylinder cap to perform the maintenance, you should open it now and check the fluid level.
If it’s low, top it up, but don’t overfill. Also, make sure you use the same spec fluid which is already in there, unless you fancy draining the whole system and starting from scratch. If the manual offers multiple choices (mine does) check with whoever did the work in the past, or the dealership. In my case, it was DOT 4.
Finishing up
Close the master cylinder cap if necessary and close the hood/bonnet if applicable.
Finally, remove the wheel chocks. Don’t forget this step!
And then put all the materials and tools away into their proper places and tidy up the shop.
Notes
| ↑1 | The point here is safety. You don’t want to remove the wheel or render it unstable until the vehicle has been properly secured on the jack stand. On the other hand, it is easier to loosen the lug nuts before the wheel is off the ground since it provides resistance to the torque. |
|---|---|
| ↑2 | Note: I have not found this to be necessary, since air compresses easily, unlike brake fluid—that is, after all, the point of hydraulic brakes! |
| ↑3 | This will of course require removing the other caliper bolt, in which case great care must be taken not to kink the brake line. |
| ↑4 | This is a metal clip attached to one of the pads which hits the rotor when the pads wear to their limit and makes a horrendous sound. If that every happens, one should stop driving as the rotor will get scored. It also indicates that one has really waited just a little too long before doing the job. |
| ↑5 | Non-chlorinated is least environmentally damaging and works just fine. |
| ↑6 | This may depend on the jack; the one I use doesn’t seem to allow for very gradual lowering. |
| ↑7 | I was actually not able to find this in my maintenance manual. On-line searches suggested this figure or slightly less, depending upon the site. |