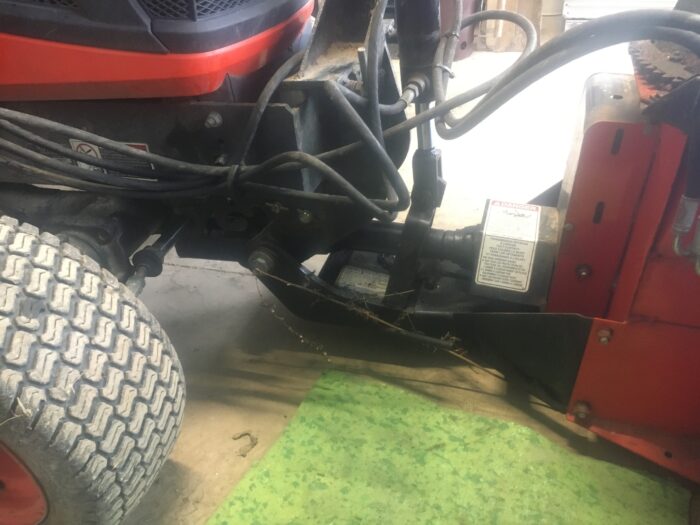
Snowblower hoses attach to tractor from back to front as follows:
- White
- Blue
- Red
- Yellow

Snowblower hoses attach to tractor from back to front as follows:
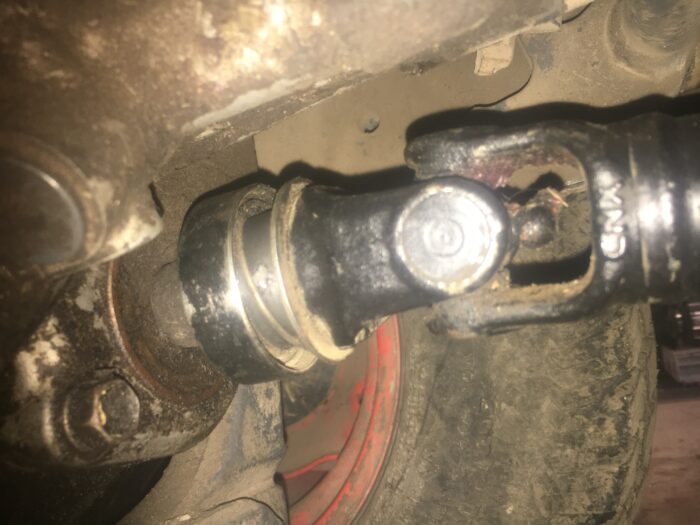
It was a nice day today (18C), so I removed the snowblower from the tractor, mounted the front loader, removed the backhoe, mounted the tiller, and then tilled the part of the triangular plot south of our driveway to the extent it didn’t have parsnips and garlic growing.
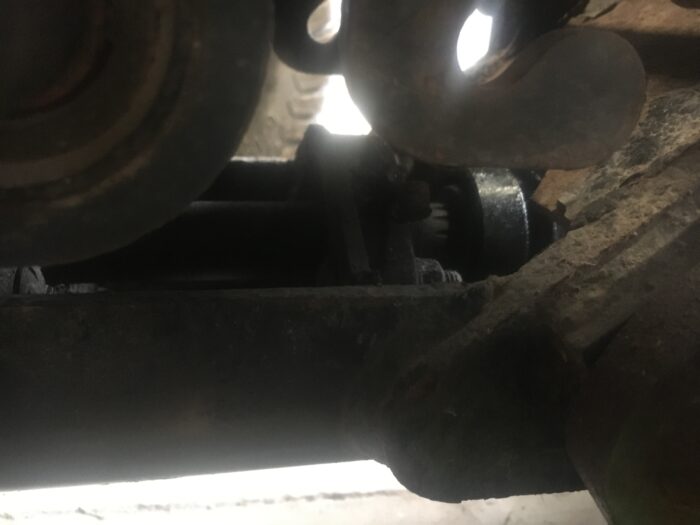
I didn’t experience too much difficulty with the implements this time, and I remembered to remove the drive shaft, too!
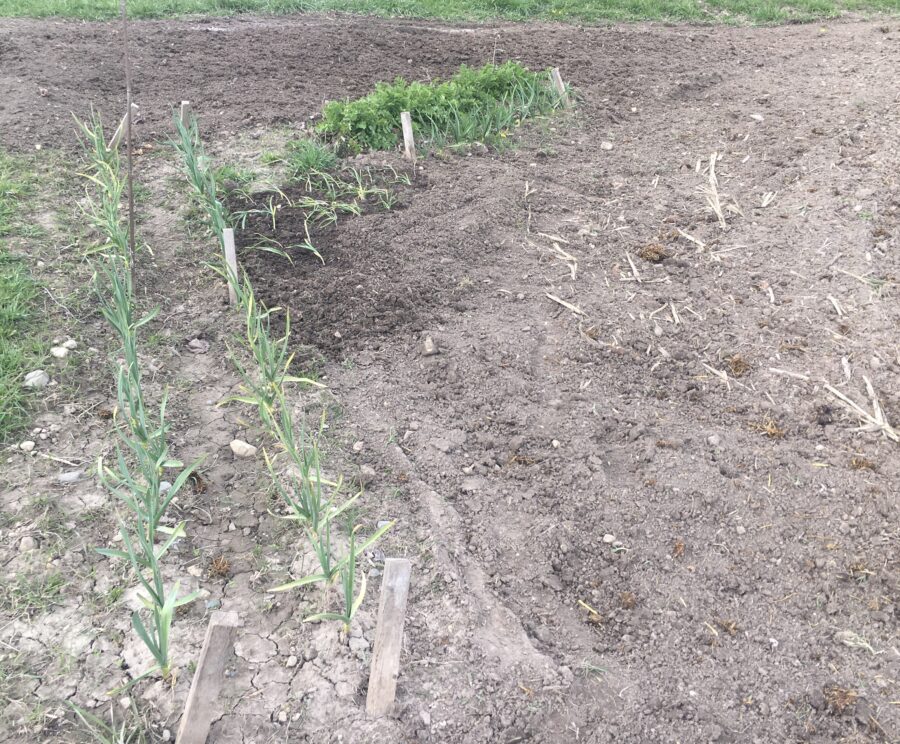
There were 53 volunteer garlic plants, so I dug them up and moved them to the area between the parsnips and the garlic (see the featured image); I planted 15 of the bigger bulbs singly, and the rest in clumps.

In the evening, I remembered that I had wanted to plant some Golden Gems (mini Yukon Gold potatoes) as we’d had some which had sprouted. As it was getting late, I only planted 6 in a N/S row between the driveway and the beginning of the two columns of garlic seen in the photo above.
When we have another nice day, I’ll plant more 🙂
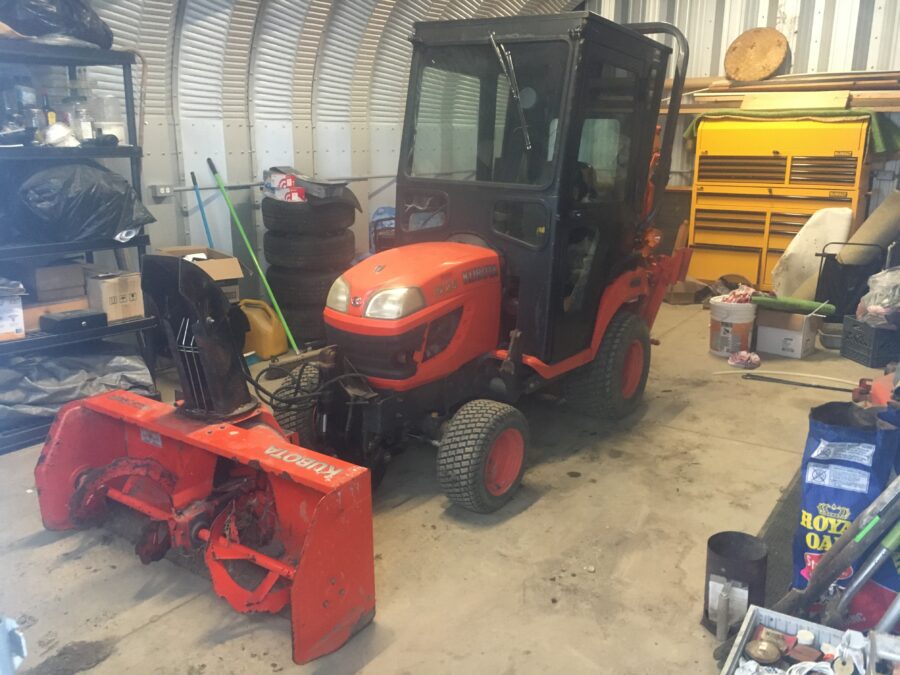
Removed the front loader from my tractor today and mounted the snowblower instead.
Removing the loader wasn’t too hard:

To mount the snowblower,
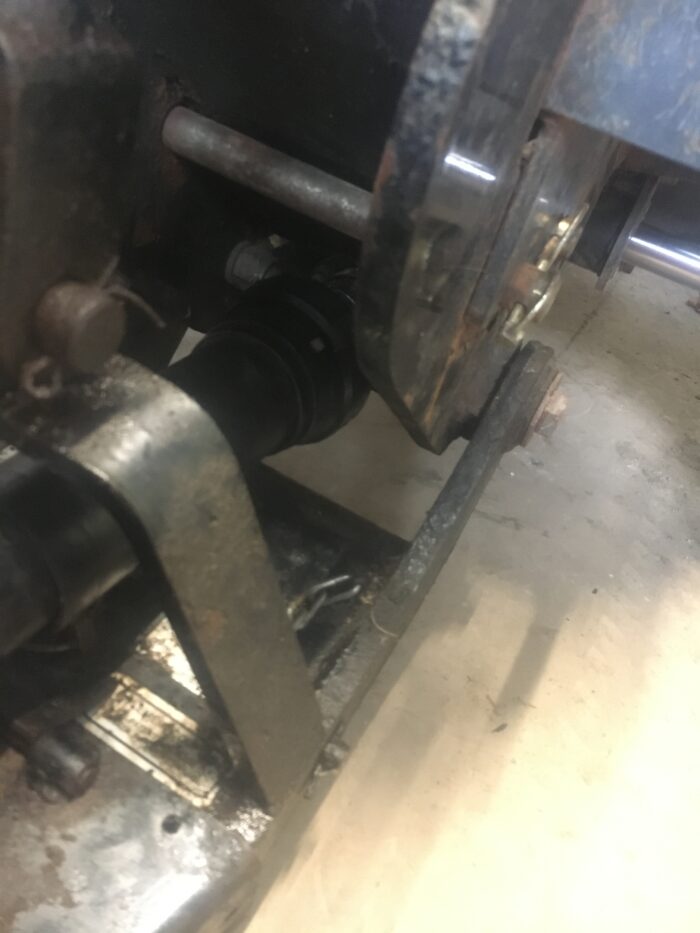
I’m getting better at it, but the whole business still takes longer than it should.
Notes
| ↑1 | Hose #1 goes towards the cab, #4 at the opposite end. |
|---|---|
| ↑2 | This involves a bit of fidgeting as the clearance is not great and the dolly angle causes a bit of pressure. |
| ↑3 | Hose #2 goes next to hose #1 and hose #3 goes into the remaining position. |
| ↑4 | This is a real nuisance; there’s very little clearance to get hands in there, and getting the collet to snap once the shaft has been pushed in is a pain. I wasn’t able to do it with my rubberized gloves on. |
| ↑5 | Another nuisance; again, snapping the collet into a lock is hard even though there is some room to manoeuvre and everything is well-greased. |
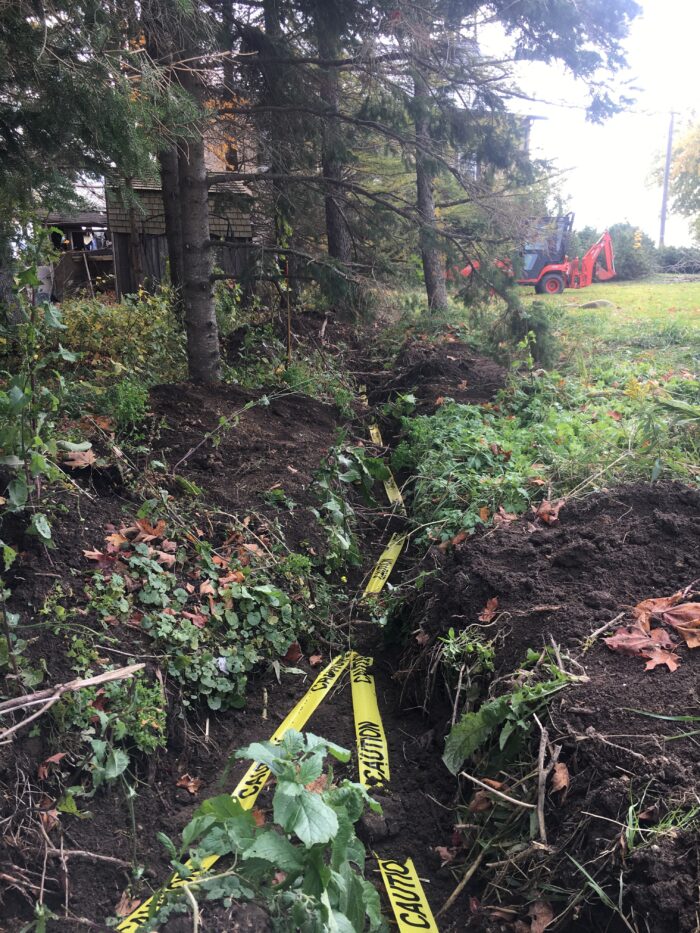
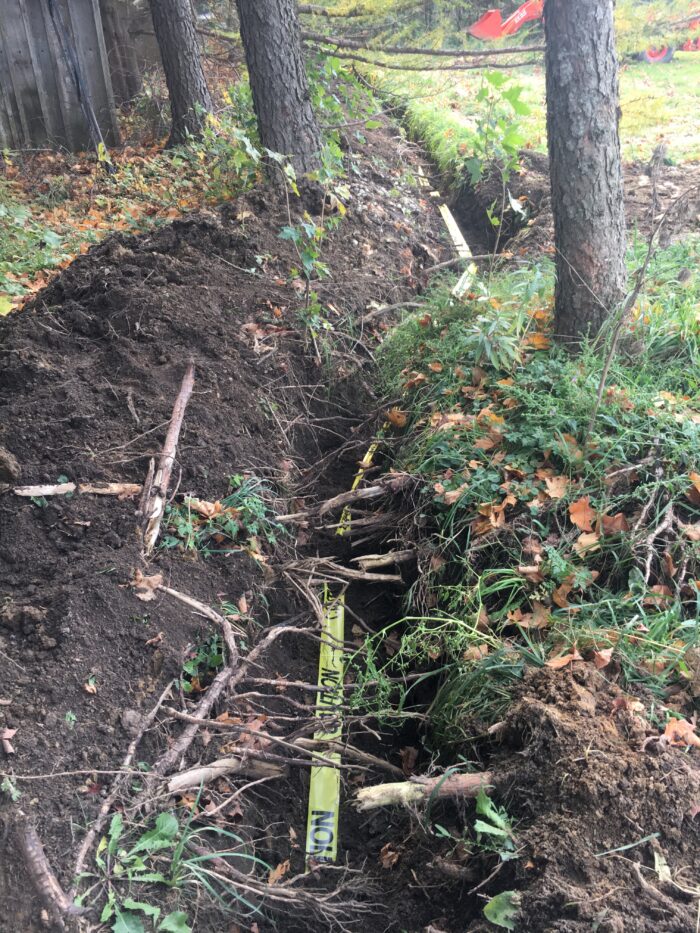
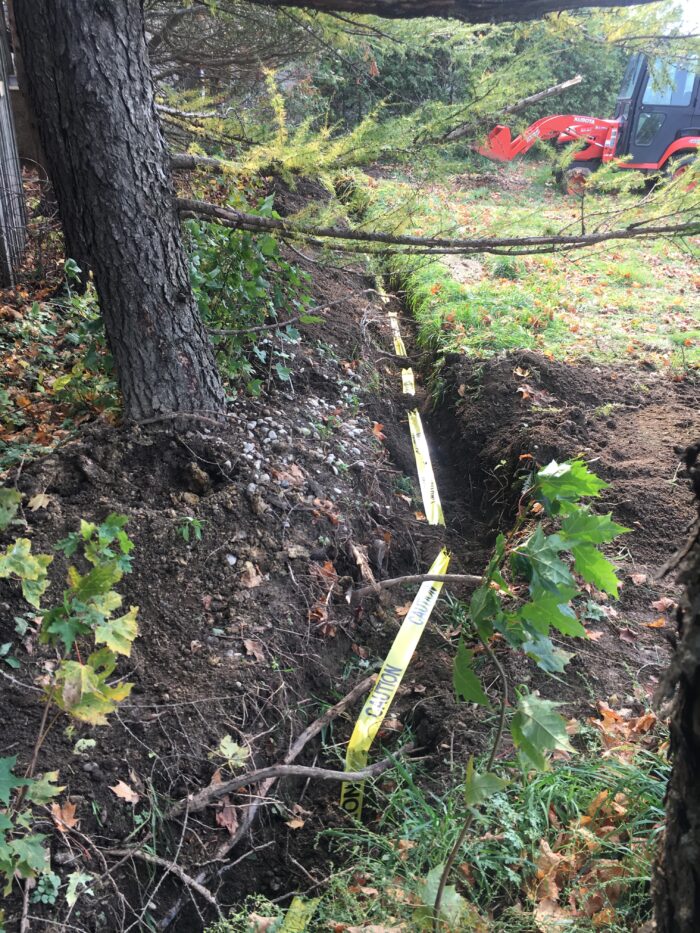
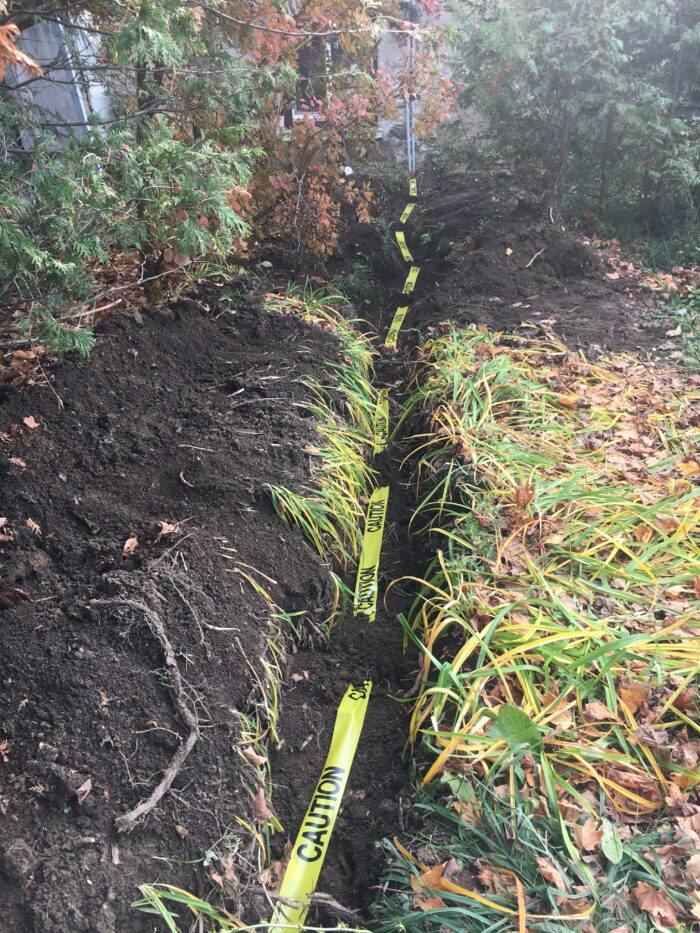
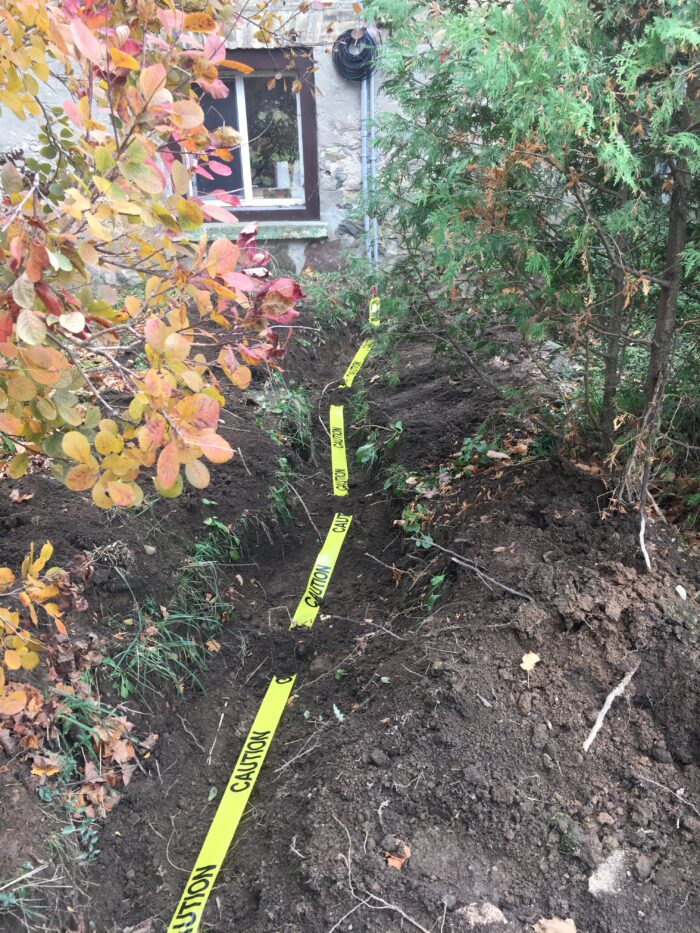
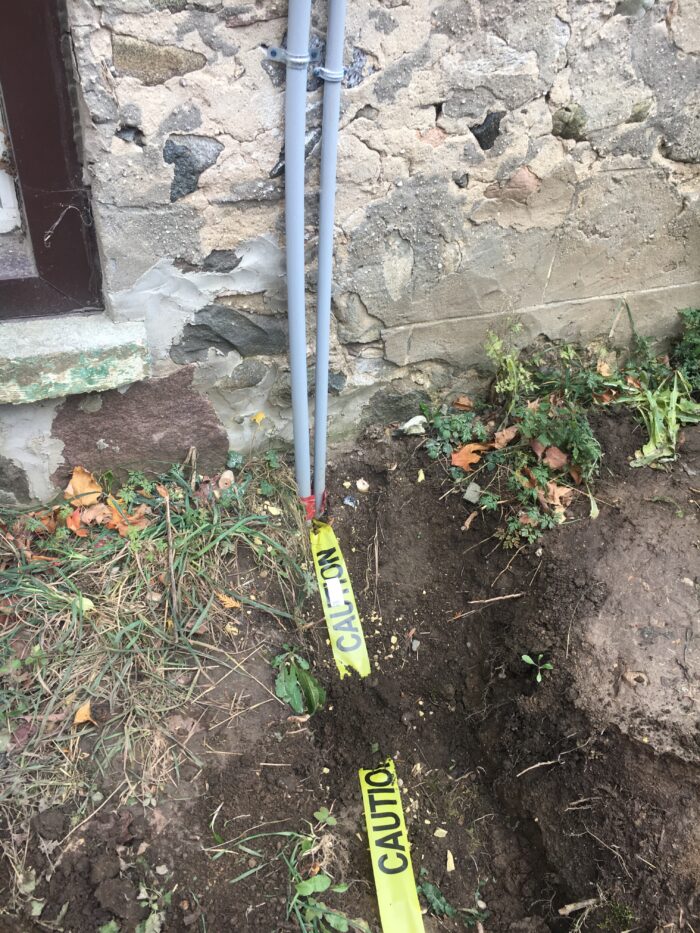
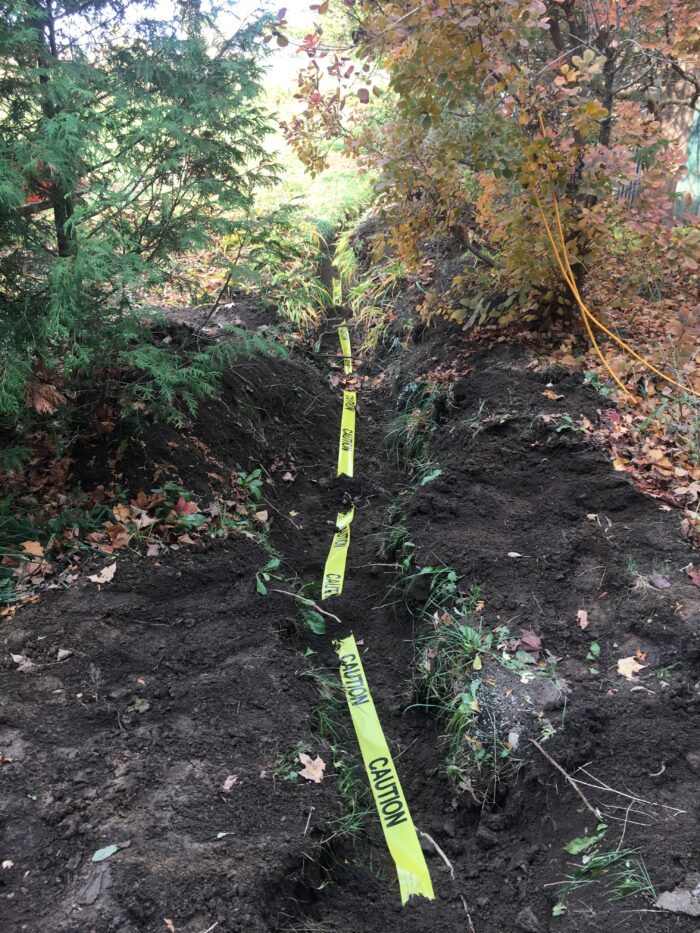
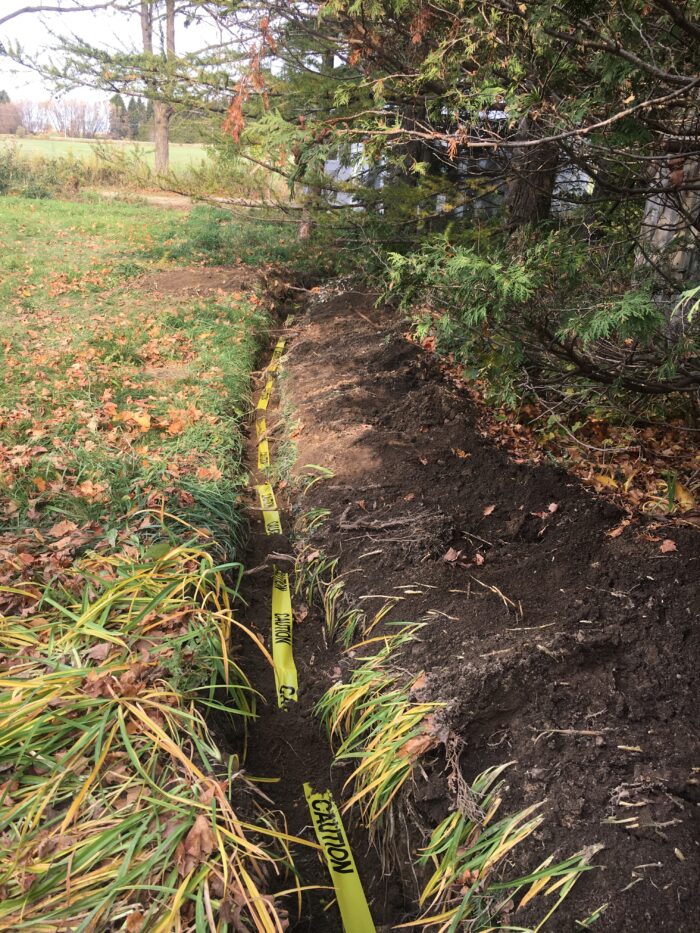
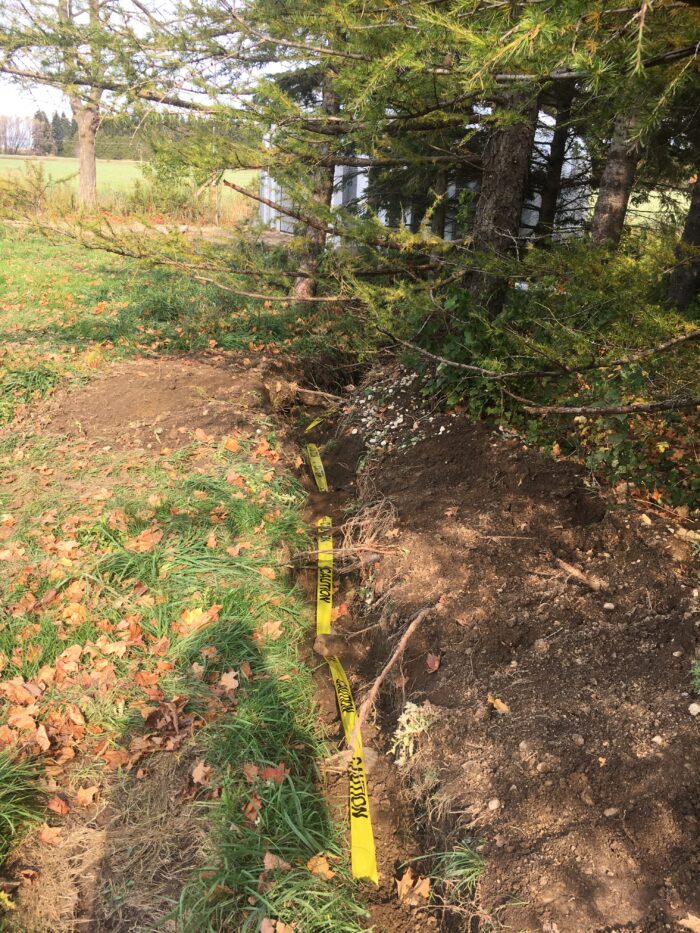
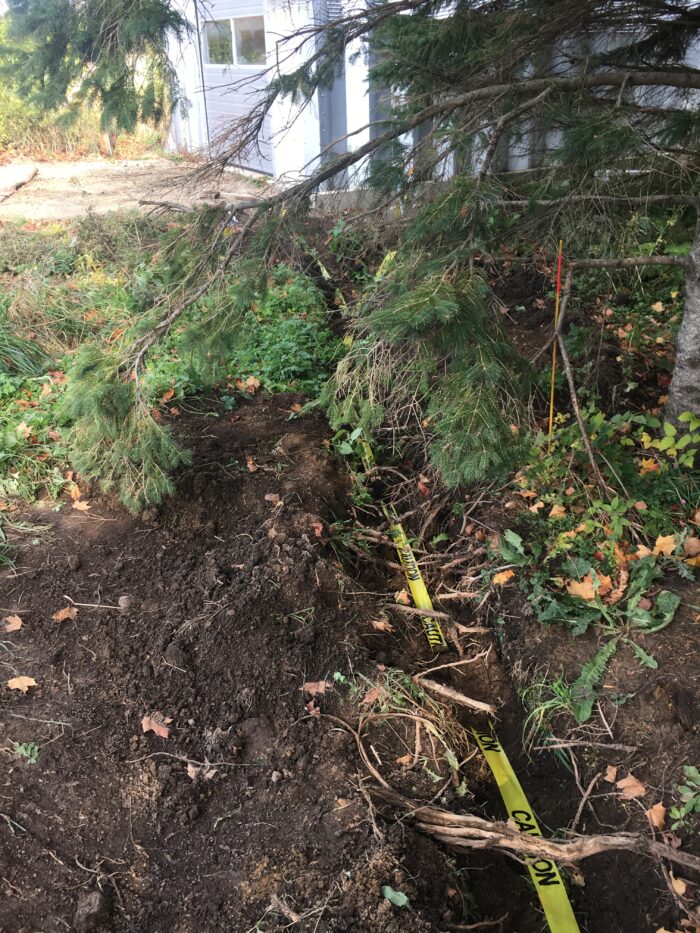
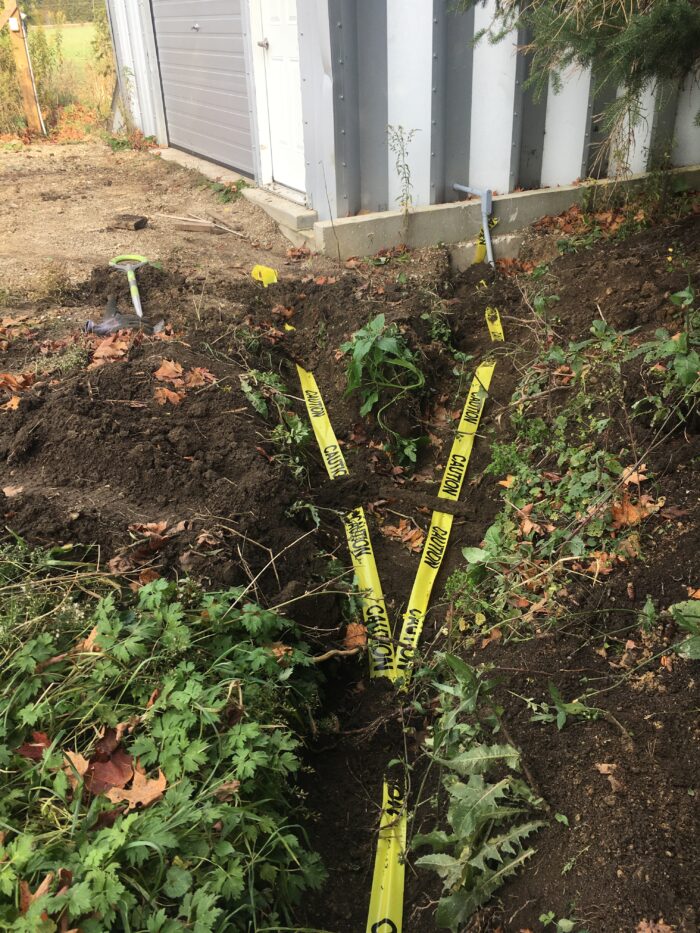
In order to get hydro to my shed and to protect the ethernet cable, I laid PVC conduit from the north side of the house to the south side of my steel shed for the electrics and past the front of the shed to the antenna tower on the north side of our property for the ethernet cable.
The electrician came last Tuesday and fed the wires through the conduit, so it was now safe for me to fill in the trench. I began doing this yesterday, and completed it today.
I filled the trench part way and then laid yellow CAUTION tape in it, except for the front of the shed, which I had had to fill in since I needed to be able to drive in and out;1)I guess I wasn’t thinking; there is no reason I couldn’t have put yellow tape in there when I did that! but it’s not that big a deal since it’s pretty deep and in any case is in a straight line from where the tape ends to the antenna tower.
Then I took photographs to document the approximate location, as shown below.

After this, I filled in the rest of the trench using the front loader as much as I could, from both sides where this was possible.
I drove around the side of the house and tried to get past the trench as it wound its way through the cedar trees; not impossible but touchy.
Guess what? I didn’t make it. The tractor got stuck in the trench and started to lean very badly to the right. Furthermore, the fuel sloshed over in the tank so that it wouldn’t feed properly and died. Total bummer.
I panicked for a bit, and wondered whether I should call the neighbour (a farmer) to come and help pull me out. But then, I had a (perhaps foolhardy) idea….
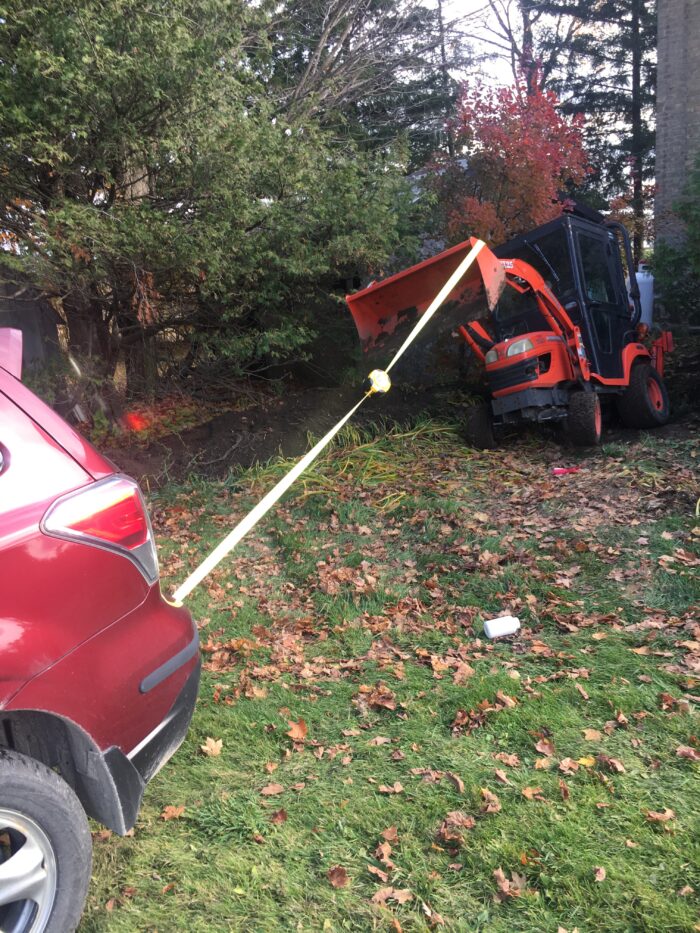
I got our Subaru Forester, mounted the hitch on it, took the emergency tow from my car, and hooked it up to the tractor. I pulled up up just enough that it was reasonably level, at which point I was able to start it, and drive forwards. Saved!!
After that, I finished filling the trench with the backhoe. It’s more of a nuisance, since it involves anchoring the tractor with loader and struts, moving some dirt, raising struts and loader, moving tractor, …, and repeating every 10 feet or so. But it worked!
Notes
| ↑1 | I guess I wasn’t thinking; there is no reason I couldn’t have put yellow tape in there when I did that! |
|---|
Powered by WordPress & Theme by Anders Norén